If your LogTag has not been configured, please click the green button below.
If you selected Push Button Start in your LogTag configuration, the logger will now be waiting for you to start it.
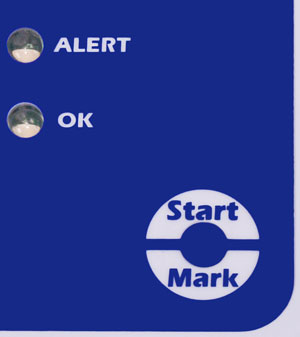
Press and hold the Start button for about a second. Both the red and green LEDs on the front of the logger will flash for a few seconds to show that the logger is starting.
After that, the green OK LED will flash briefly about every 8 seconds to show you that the logger is recording.

The LogTag with Display can be a bit tricky to start. If you don’t see “REC” being displayed, the logger has not been started.

Warning! Your LogTag is not recording…
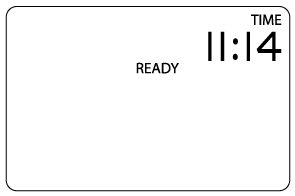
If the LogTag is not recording, it will look like this

Warning! Your LogTag is still not recording…
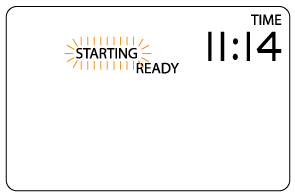
The word STARTING will appear and flash.
Continue holding the START button
until the word STARTING stops flashing, then release it. This can take from 1 to 5 seconds.

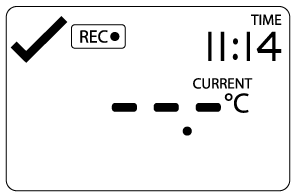
Step 2: Release the Start button when the screen shows “REC”
The word REC indicates that the LogTag is recording data.
If the LogTag screen goes back to saying READY, it is NOT running and you will need to repeat the starting procedure.
Once your LogTag is configured and you have started the LogTag, the next step is to click the green button on the right to find out where to place the LogTag.
If you have any issue whilst doing this process, visit our support page for answers https://www.logtag.com.au/logtag-training/troubleshooting/.
You can also talk to our support team on 1300 08 20 20.
We are a real team, working from our office in Castle Hill, Sydney, providing genuine support! We are here to support you, both now and in the future. Feel free to pick up the phone and give us a call on

LogTag Temperature Recorders are distributed in Australia by

KEEP OUT OF REACH OF CHILDREN
LogTag loggers contain small batteries. Swallowing can lead to chemical burns, perforation of soft tissue, and death. Severe burns can occur within 2 hours of ingestion. Seek medical attention immediately.